CARGILL - BROCKTON | SUNROOM ADDITION FOUNDATION
Cargill - Brockton | Sunroom addition foundation. We recently started this sunroom addition project, which will be a start to finish project.

Walkerton Sunbelt Rentals provided this Kubota KX080-4 mini excavator we used to strip and pile the topsoil to spread on the disturbed areas after.

Excavating the material from the foundation hole and loading to be removed from the construction site.

The Miller Group provided the cement for our project. These are our freshly poured concrete footings with a keyway cut in to receive the new foundation walls for this addition.


The walls are freshly poured and have been covered with insulated tarps to protect from the temperature drops. Chemicals have been added to the cement mix to make it generate heat as well as the cement was made with hot water because of the time of year to help it cure.

The boys (Gabriel Bender and Jude Bender) took time from school to come be a part of pouring this foundation. This gets them a hands on experience at a young age and provides opportunity for the next generation to take on and experience the work organically and develop skills naturally. Work ethic is developed and skills are learned.

Farlow’s Home Hardware provided the Home Builder fibrated asphalt foundation coating to waterproof the new crawlspace.


After the foundation coating has cured we installed Delta MS foundation wrap from Farlow’s Home Hardware to provide drainage to the new crawlspace. It is wrapped down to the weeping tile which is covered in drainage stone and filter cloth before material that was removed during excavating is place back around the foundation. The weeping tile ties into a sump pail in the new crawlspace.


The foundation is backfilled and ready for the sill plates to be installed on the anchor bolts that were placed in the concrete to secure the floor system to the foundation walls.


Welbeck Sawmill delivered our floor system and we have installed the new Pressure Treated sill plates on sill gasket and Typar house wrap. This is holding the new 2” x 12” floor joists @ 12” on centre with two runs of solid blocking to ensure a floor with very little deflection. This all gets covered in a 3/4” tounge & groove plywood sub-floor which is glued and screwed.

Solid blocking ensures all the joists stay in their place, can’t twist and makes everything binds together and shares the load on the floor joists.

Would also like to give a big thank you to Jamie Kuhl of ArchLines for all the design work on this project and with the permit process to make this all happen for our customer.

After the sub-floor was completed we covered the entire floor with insulated tarps to ensure the cold stays out of the foundation until the walls are up and everything is closed in.
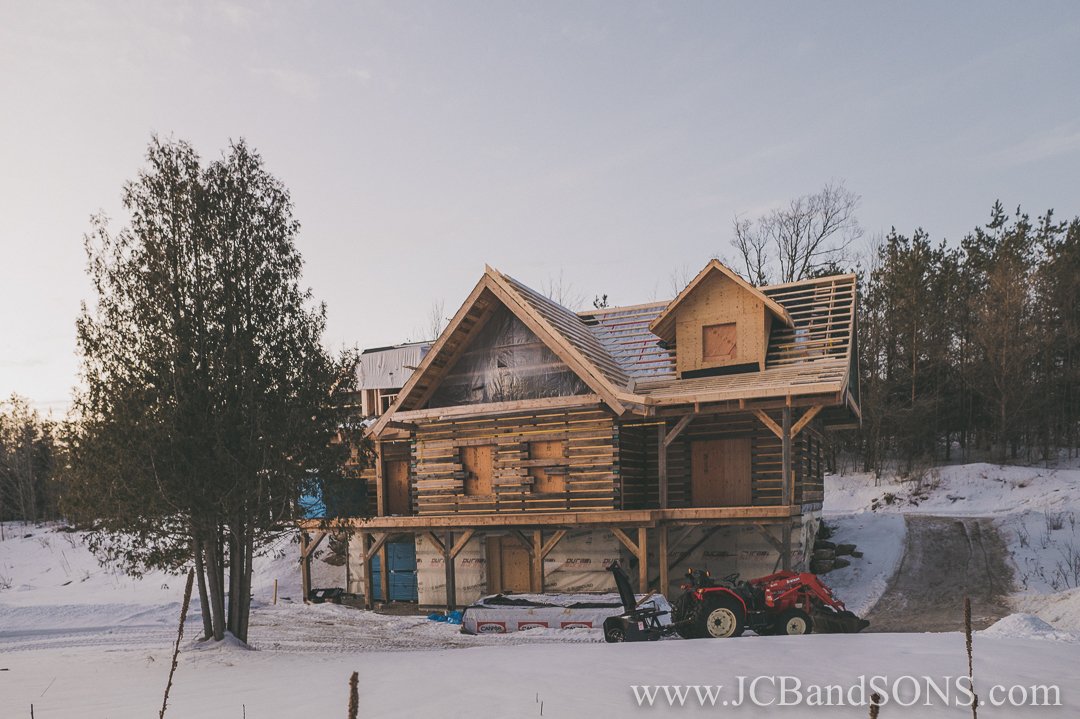
BERKELEY - CHATSWORTH | ECO LOG HOME RAISING THE ROOF & DORMERS
Berkeley - Chatsworth | Eco Log Home raising the roof & dormers. We completed all the roof framing and dormers. We also installed all the roof buildups and roof insulation for the home.


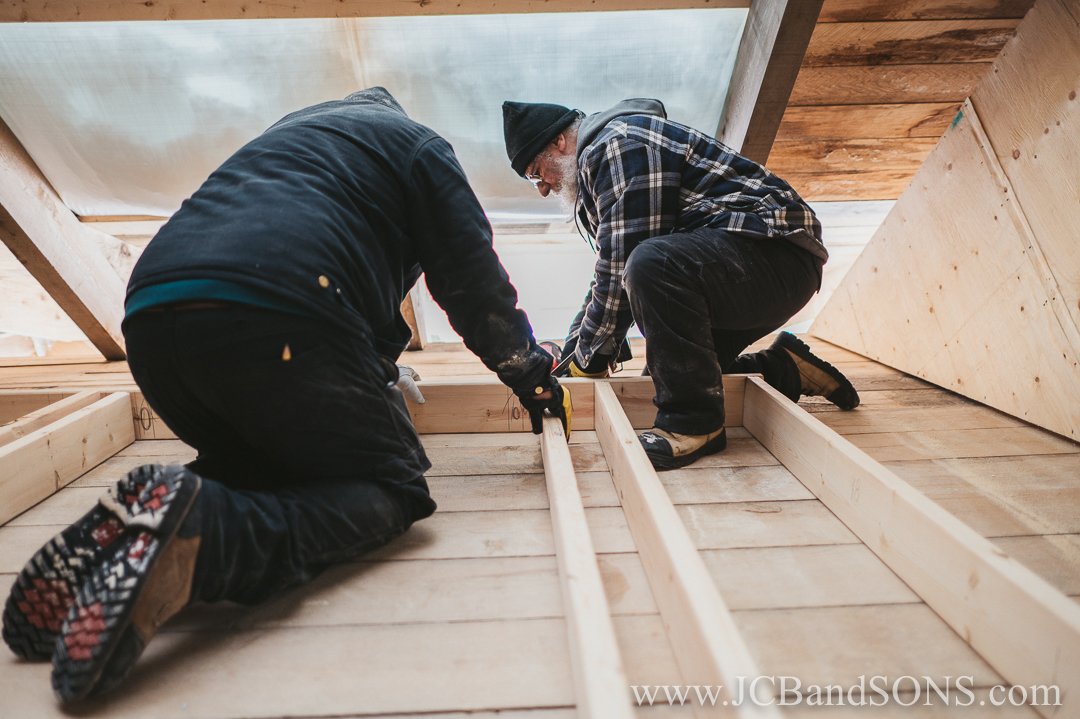
2”x6” dormer walls set and ceiling joists placed on 16” centers.

Laying out for the collar ties that will be installed.

Because of the time of year the openings were tarped every night to keep the snow out of the home.
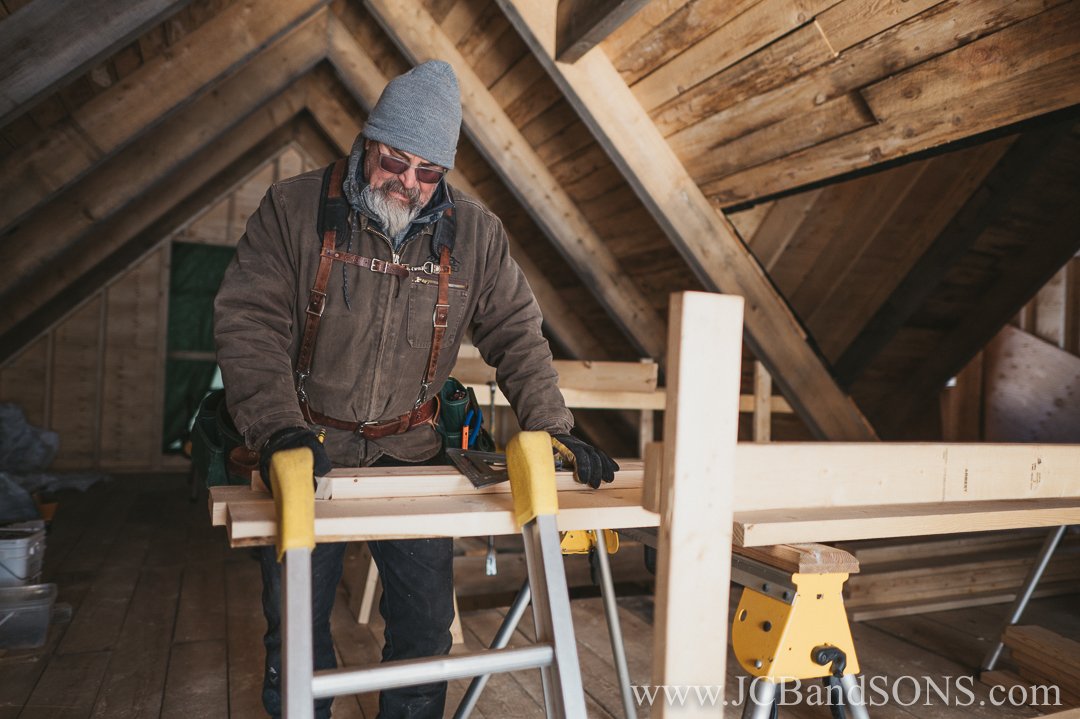
JCB getting pieces laid out and cut for the guys as they get the dormers framed up.


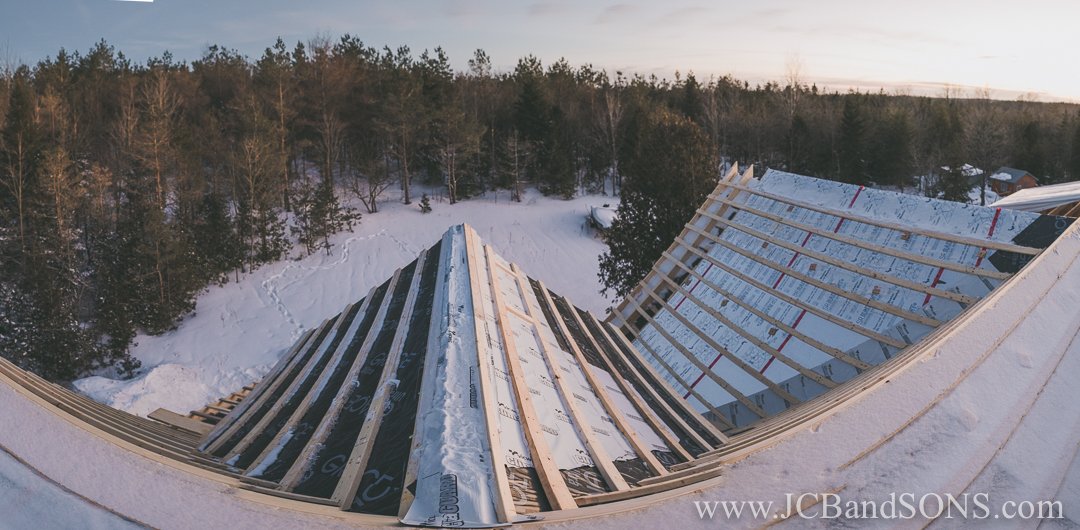
First half of the roof completed and ready for the future steel roofing.
Walls set on the second half of the roof for the last 2 dormers going on.

We are a family business and everyone pitches in. Alisha came in to help make sure our site stayed safe and clean for us.

The hemlock ceiling boards where all left long until the end on the gables. This allowed us to snap a perfectly straight chalk line to cut them too. We were able to manipulate the 4” x 10” trusses then to follow our perfect line keeping the ends very straight and clean looking.


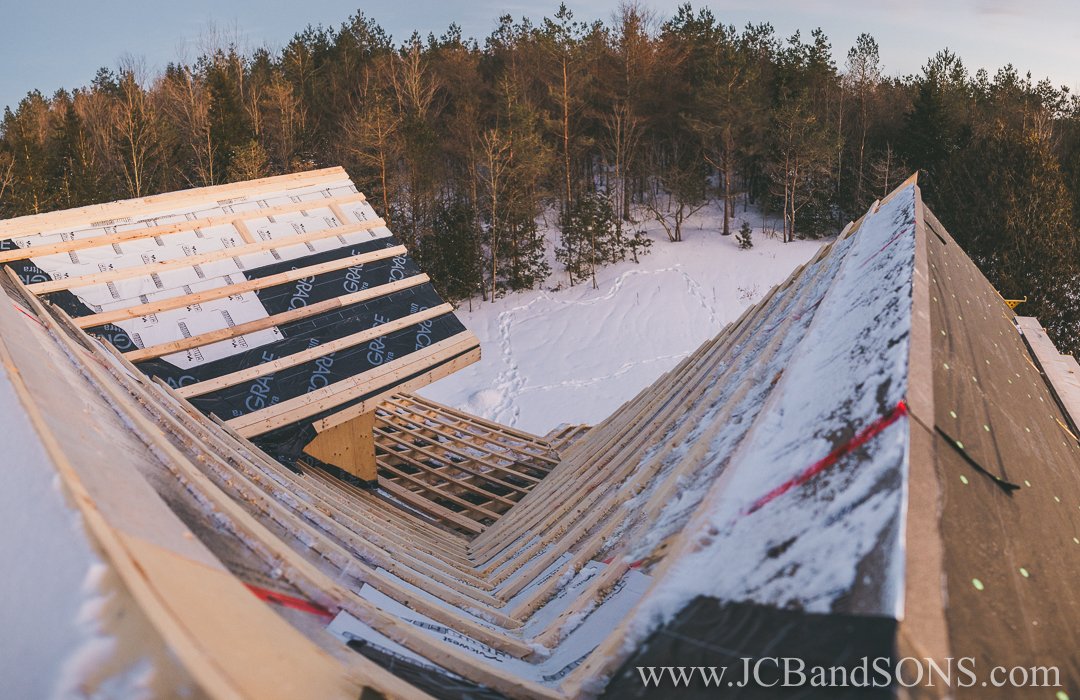
The roof was made up of multiple layers. First the 1” x 6” hemlock ceiling boards went down. Then a synthetic roofing membrane was installed with ice and water shield in the valleys. Next we installed two layers of Styrorail insulation. A base layer of 3” SR.P200 Graphite which can’t stay exposed to any sunlight and then a second layer of 3.5” SR.Radiant+ which has a vapour barrier reflective membrane laminated to it. All layers have offset joints which where taped with Tuck Tape sheathing tape. We then cover the valleys & dormers with an additional layer of GRACE Ice and Water Shield HT. Finally all this is covered with a layer of 2x4 sheathing installed @ 16” o.c. for the new steel roofing.


Over the balconies at the gable ends and the porches we used a 2x8 rafter build up to match the 6-1/2” of insulation and then installed the 2x4 sheathing over top of them @ 16”o.c.


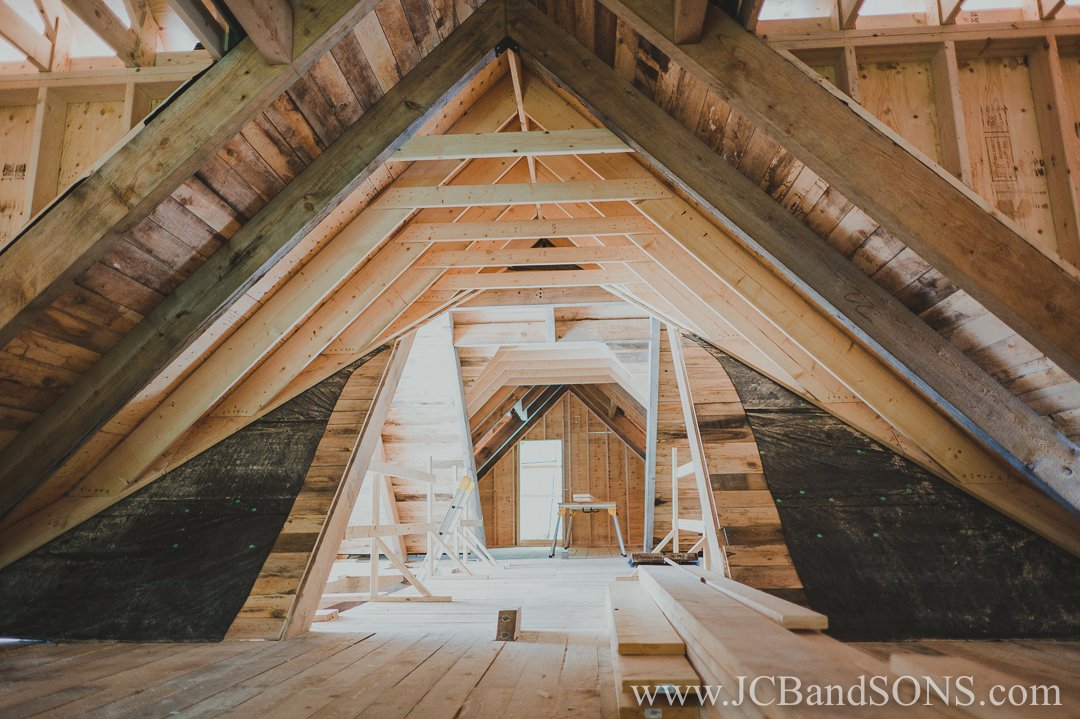
Completed jack rafters forming the valleys of the home with collar ties installed to prevent any uplift or separation from the roof peak.


We pulled some large tarps over the home at the completion of our work to leave the home ready for the new steel roof install.
WEST GREY, ONTARIO | PRICEVILLE HERITAGE LOG HOME ADDITION & RENOVATION
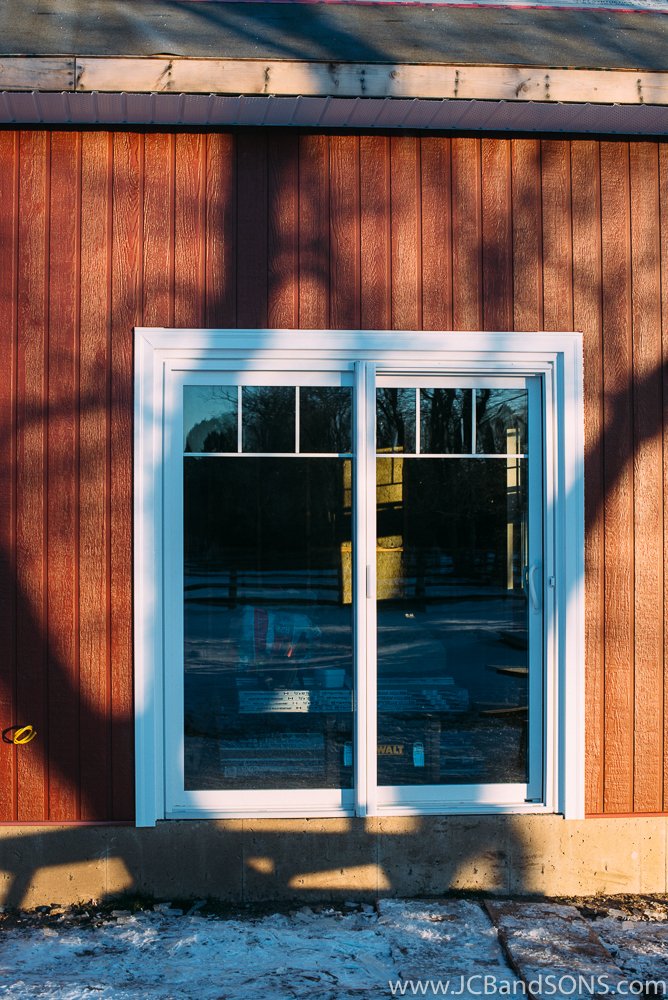
West Grey, Ontario | Priceville Heritage Log Home Addition & Renovation. We installed this horizontal red engineered wood siding for our customer on this project. We made and installed all the aluminum trims for this project as well. A synthetic membrane was installed on the roof for our customers chosen roofing contractor. All the windows and doors were supplied and installed by us. They were flashed with typar flashing tapes to insure a waterproof finish that will last decades.


The existing porch was kept and modified to tie into the new addition as well as extended to offer protection to the logs of the log home.

The log home had a fantastic view from the second floor, so we installed these apex shaped windows in the gable wall of the home to take advantage of it. It was one of our favourite features.

John Manville AP foil-faced 1” foam sheathing was used for the wall sheathing to provide continuous insulation over the whole addition. Providing and R-28 wall with the Rockwool batt insulation.


Prior to the install of strapping and siding we installed new Typar weather protection barrier over the existing exterior walls to protect the homes exterior.

The walls were all strapped with 1” strapping to create an air space behind all the new siding.


All the windows and doors were clad with aluminum trims we manufactured on site and installed prior to siding installation.


Check out the completed project @ > https://www.jcbandsons.com