
WEST GREY, ONTARIO | PRICEVILLE HERITAGE LOG HOME ADDITION & RENOVATION
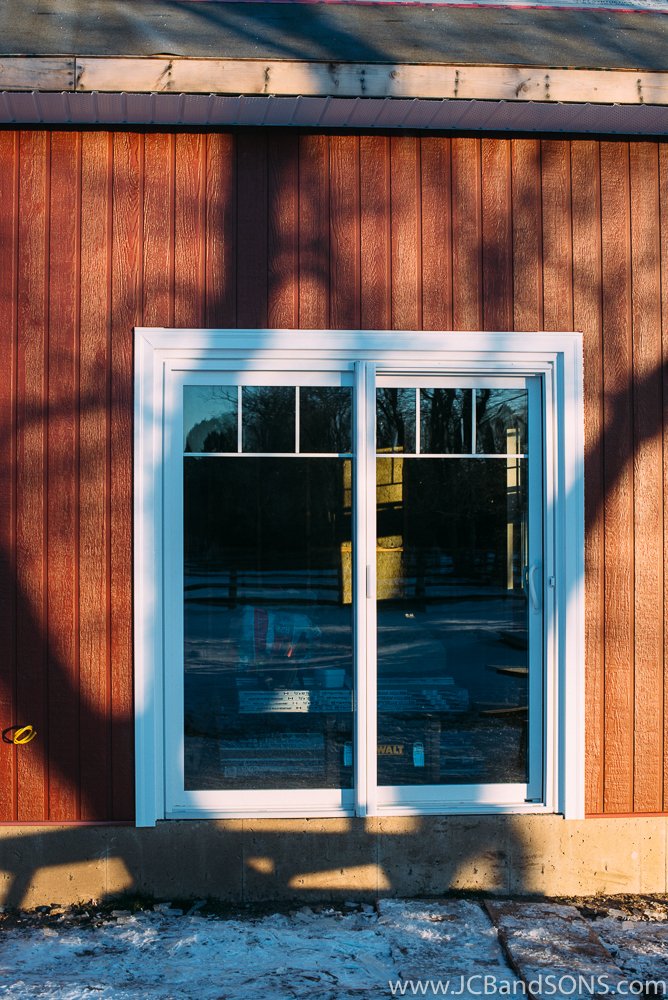
West Grey, Ontario | Priceville Heritage Log Home Addition & Renovation. We installed this horizontal red engineered wood siding for our customer on this project. We made and installed all the aluminum trims for this project as well. A synthetic membrane was installed on the roof for our customers chosen roofing contractor. All the windows and doors were supplied and installed by us. They were flashed with typar flashing tapes to insure a waterproof finish that will last decades.


The existing porch was kept and modified to tie into the new addition as well as extended to offer protection to the logs of the log home.

The log home had a fantastic view from the second floor, so we installed these apex shaped windows in the gable wall of the home to take advantage of it. It was one of our favourite features.

John Manville AP foil-faced 1” foam sheathing was used for the wall sheathing to provide continuous insulation over the whole addition. Providing and R-28 wall with the Rockwool batt insulation.


Prior to the install of strapping and siding we installed new Typar weather protection barrier over the existing exterior walls to protect the homes exterior.

The walls were all strapped with 1” strapping to create an air space behind all the new siding.


All the windows and doors were clad with aluminum trims we manufactured on site and installed prior to siding installation.


Check out the completed project @ > https://www.jcbandsons.com
WEST GREY, ONTARIO | PRICEVILLE HERITAGE LOG CABIN ADDITION FRAMING
West Grey, Ontario | Priceville Heritage log cabin addition framing. The choice was made to conventionally frame this addition on a slab on grade foundation we poured for this client. Matching the pre existing addition already added to the back of this cabin. The attic space of our addition will provide storage space as well as a location for the new high efficiency furnace and duct work as well as a new HRV for the entire home. These walls were 2x6 on 16” centers with solid blocking and wind bracing to allow rigid insulation sheathing to be installed directly over the studs. Acewood Carpentry worked closely with us on this project from start to finish.


Ethan Bender from Acewood Carpentry was an integral part of this project and was with us from start to finish.

Our Branson is on site with JCB himself and used to safely handle and place materials for this project. Ethan is prepping for installing rigging to set the 40’ LVL ridge beam.
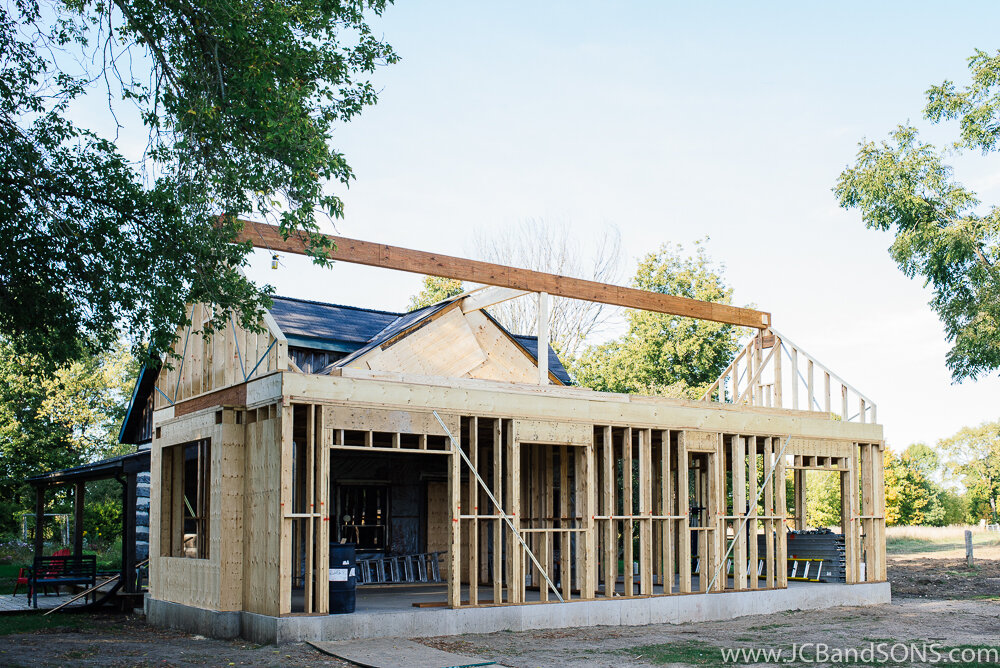

The 40’ 3ply LVL ridge beam is in place with the middle column installed ready to receive the first of our rafters.

JCB cutting our rafters and placing them on our Branson to lift them into place.

Rafters are set higher then the ridge beam to allow baffle vents to run continuously from the vented soffit at the eaves to vented ridge cap at the peak, preventing any ice damming on this roof.

Fascia board lookouts are installed and gable Fascia is started. Almost ready for sheathing.

The roof was sheathed with 5/8” plywood and covered in a combination of Alco ice and water shield as well as Rex synthetic roofing underlayment.

The bump out window roof sheathing was left off so that the spray foam insulators could spray closed cell foam in it while spray foaming all the rim joist in the new addition. These areas are difficult to seal properly with other insulating methods.

The 2” x 12” rafters provide maximum space for storage in the new attic as well as room for insulation and ventilation allowing the correct R value required to keep this home cool in the summer and warm in the winter and prevent any ice damming.

John Manville AP foil-faced 1” foam sheathing was used for the wall sheathing to provide continuous insulation over the whole addition. Providing and R-28 wall with the Rockwool batt insulation.


The interior is a blank canvas, ready for windows, doors and then removing the old exterior wall to open up the existing home to the new addition. This will become the new kitchen and dining room as well as a main floor master bedroom with walk in closet and ensuite.

TOWNSEND LAKE WEST GREY ONTARIO COVERED PORCH BUILD | JCB AND SONS
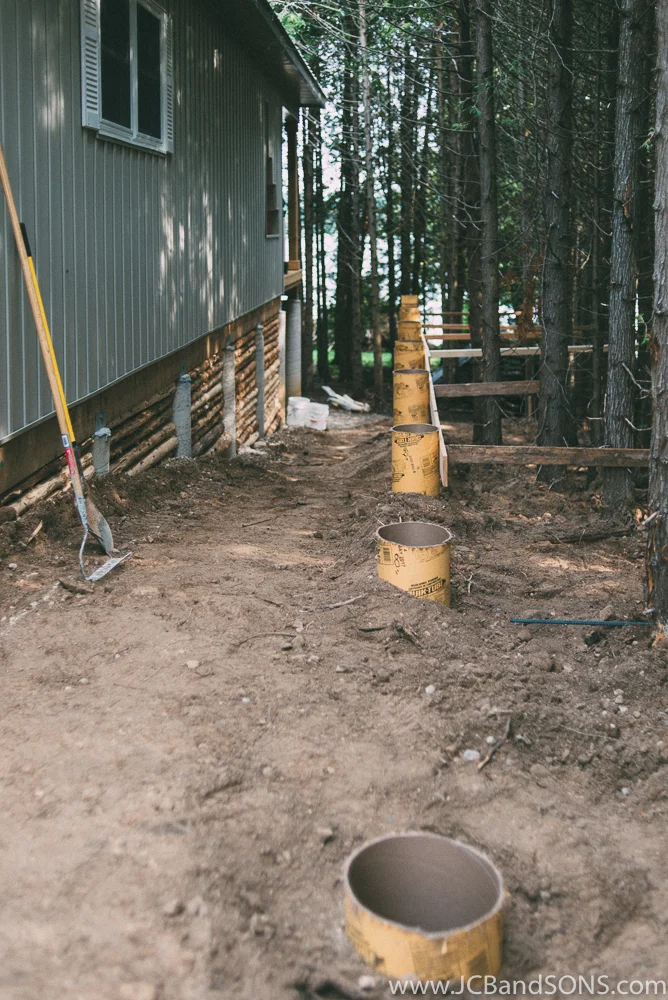
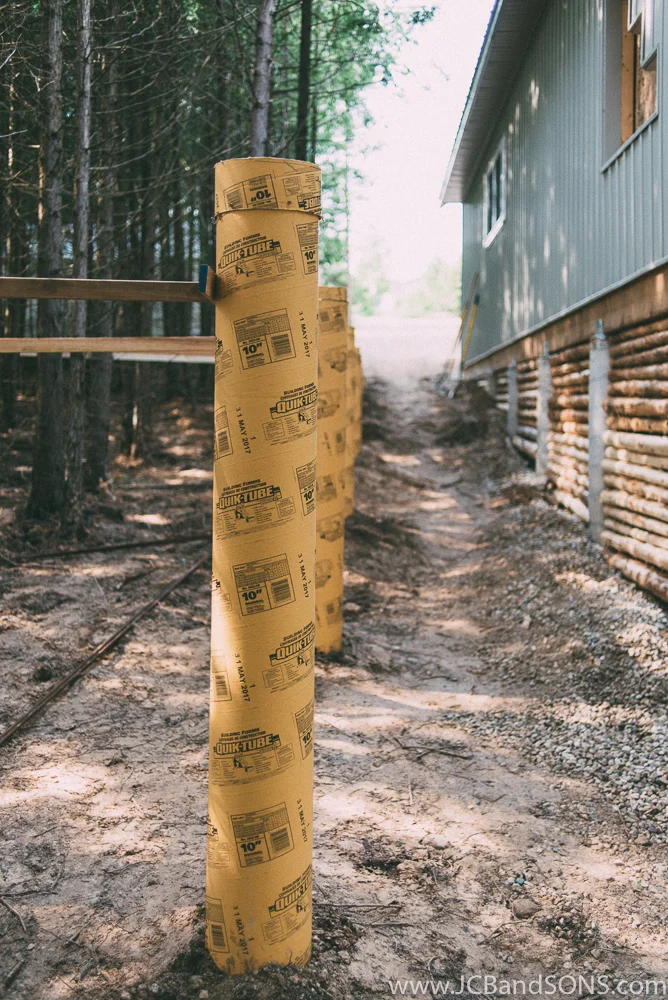
We built this new covered porch on this cottage to allow access from the front of the cottage to the back deck overlooking Townsend Lake. The foundation piers were created using BF20 Bigfoots with 10" quick-tubes installed 4'-0" below grade to ensure adequate frost protection.
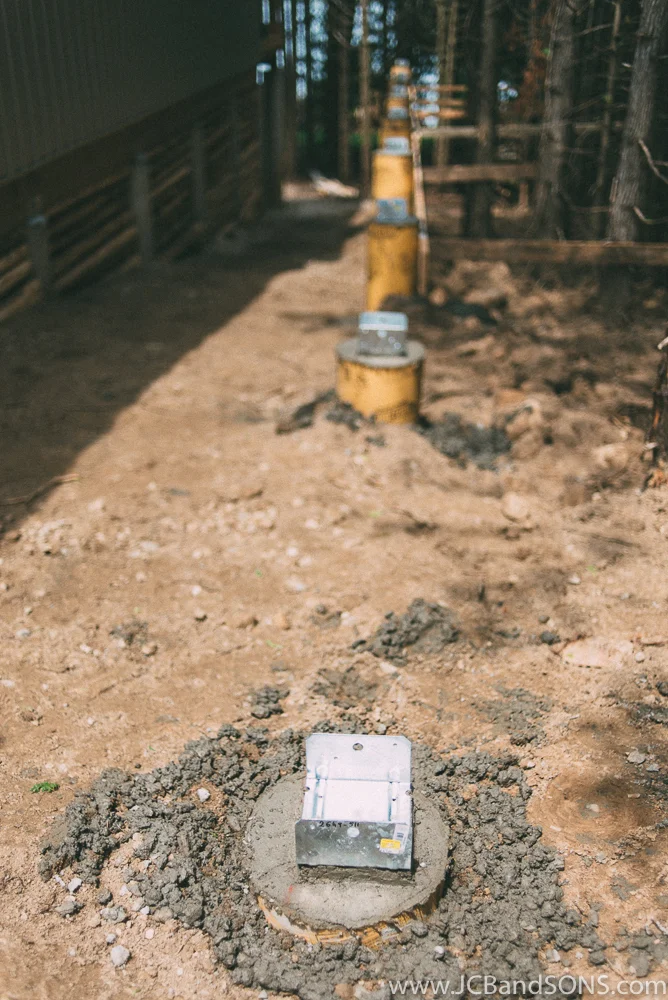
The piers were filled with cement and 2 pieces of 15mm rebar to make strong supports as well as carport saddles were installed to anchor the new structure to the base.


Deck building is a form of trim carpentry so all corners are mitered even on the framing.

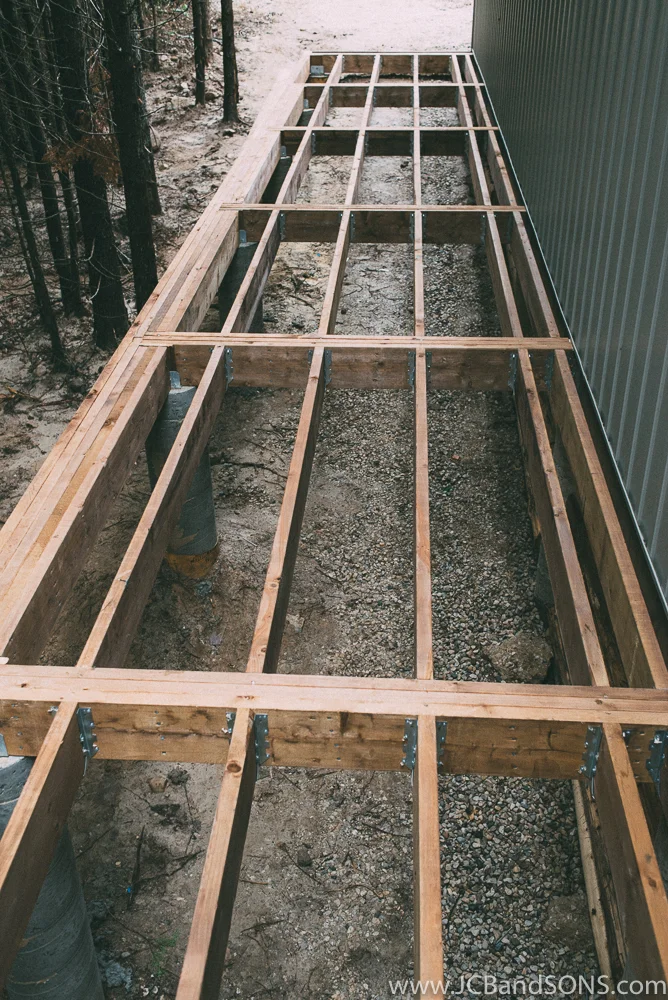
Galvanized joist hanger brackets were used with galvanized joist hanger nails to get flush beams keeping the framing off of the ground even at the lowest end.
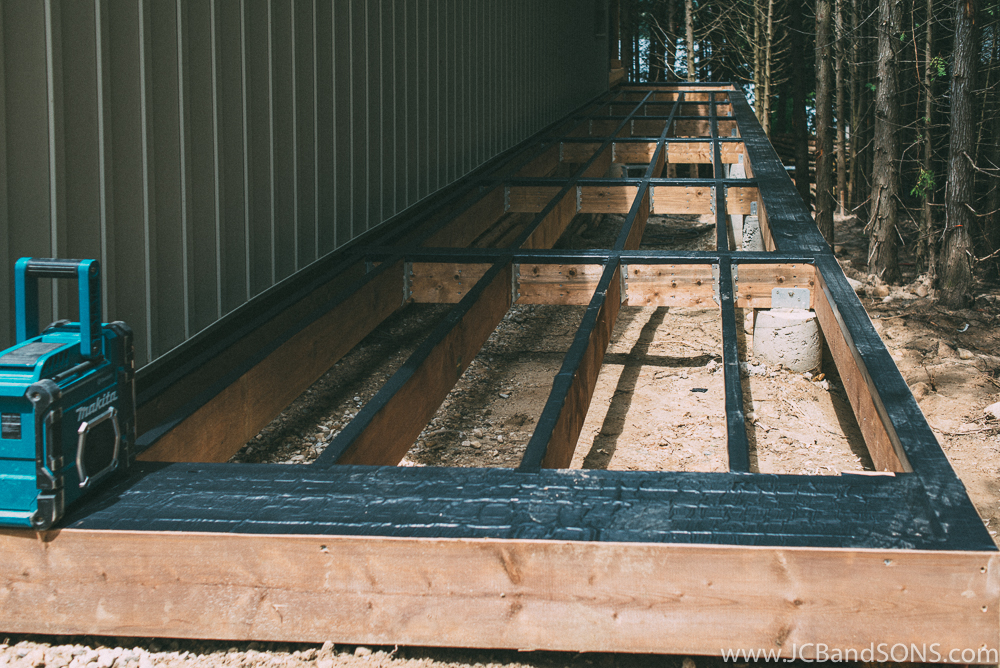
Deck flashing was used on the top of all the framing to ensure the top of the framing will not rot.


Kreg Jigs hidden deck fastner system was used to hide all of the screws used to fasten the decking.


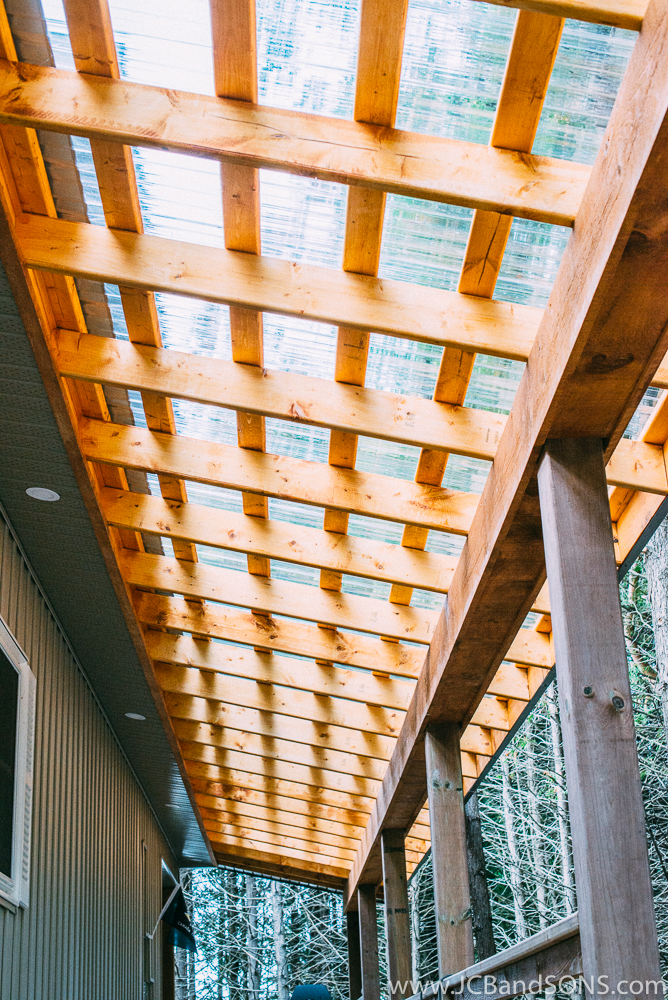
All of the roof framing stayed exposed so the rafters and strapping were all rounded over and a coat of Sikkens Stain was used to weather proof it prior to installing.
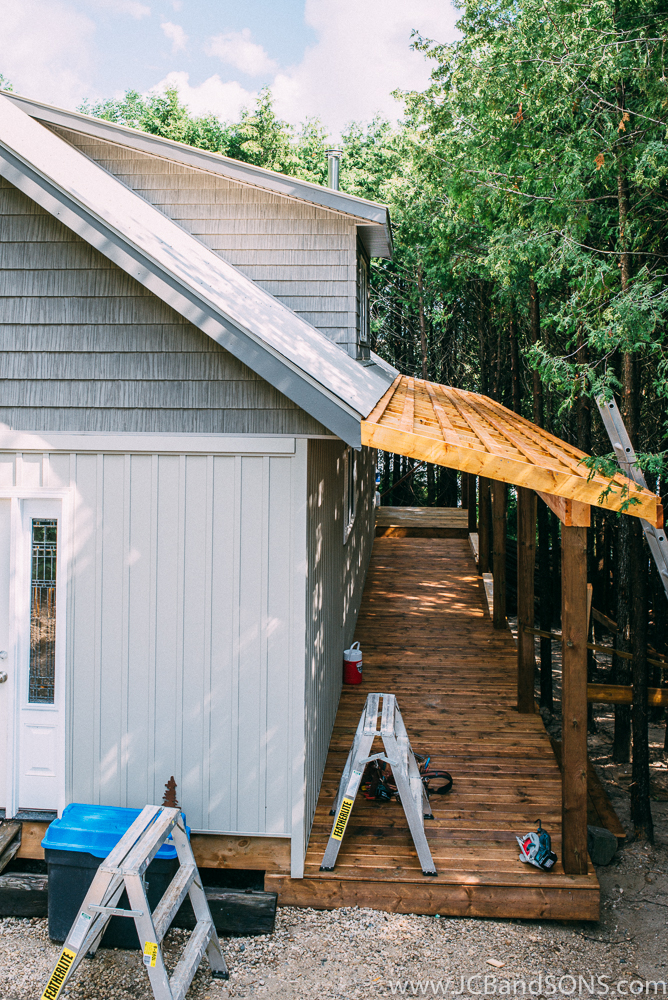


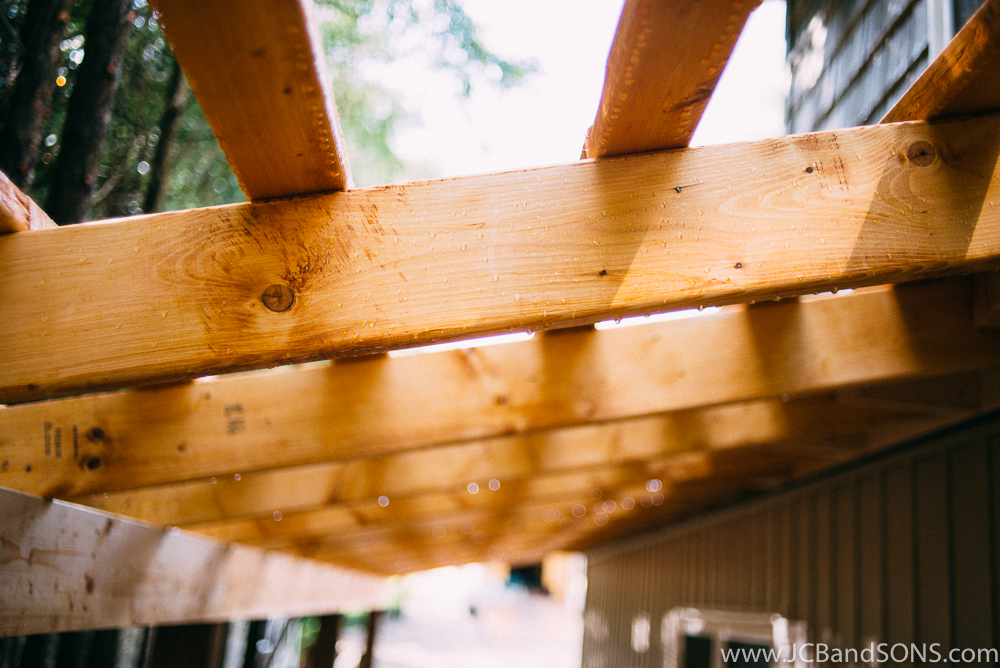

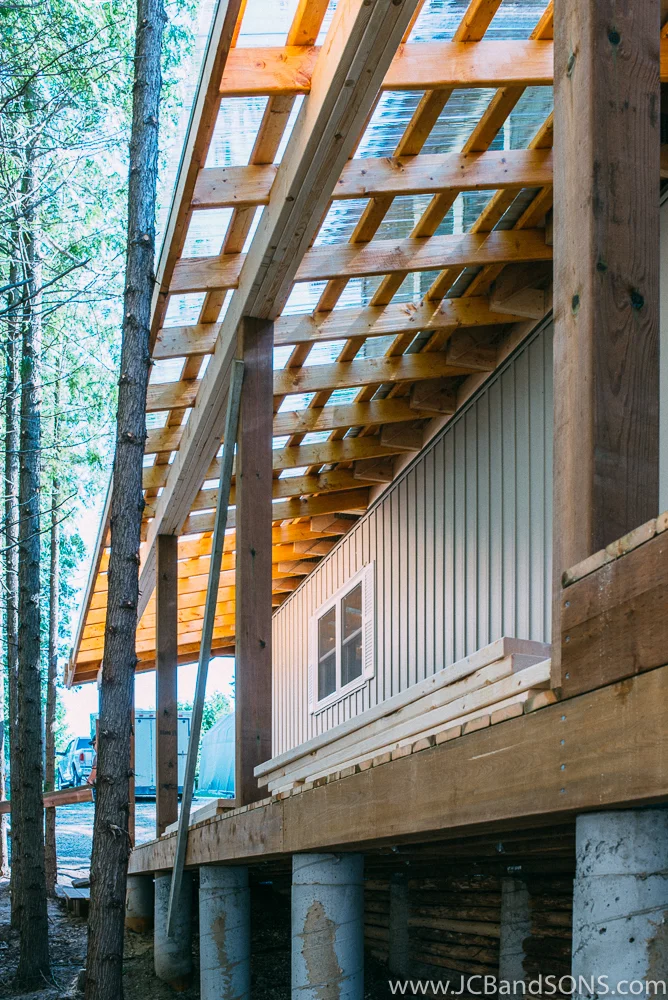

Steel roofing was used on the 2 ends and polycarbonate x-ligh was used to keep the porch roof nice and bright. Strapping was ran on 12" centres to give lots of support to the x-light.


The wooden structural beam was clad in pine barn board and finished with a coat of Sikkens Cedar Stain.

We installed new vented soffit on the ends to tie neatly into the home and clad all the fascia boards in aluminum fascia we custom bent on site.

We installed 2"x4" rails with a 2"x6" handrail which received a nice big round over to create the railings for the porch. The homeowner has plans for his own spindles and is looking after that himself.
